A few months back, I made a rug as a going away/housewarming gift for a couple of friends moving to Seattle. The good thing about an ombre or variegated accent piece is that it brings out all shades of a main color and ties in other similarly hued accessories. In the words of The Dude, "That rug really tied the room together!" And it's true.
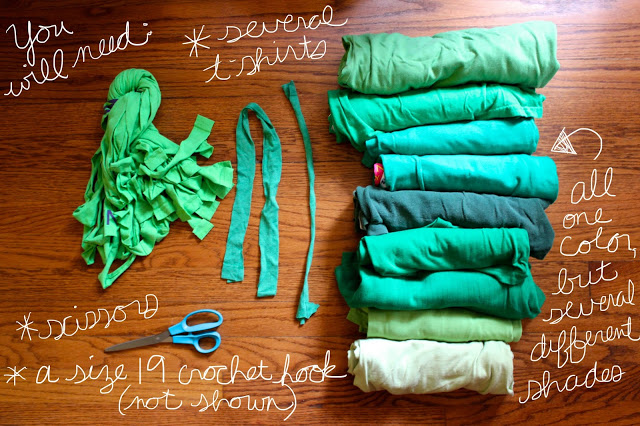
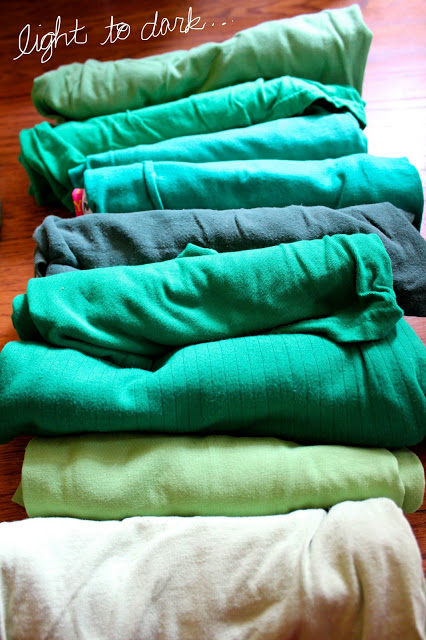
All you need for this DIY is a minimal knowledge of crochet stitches, a pair of scissors, a giant crochet hook (I used size 19, the largest I could find at the time) and a ton of t-shirts. Buy all the same color (such as green, or red) and then get as many different shades as you can - light, dark, dull, bright, just as many shades as you can find of the particular color you are going to use. Larger t-shirts are better, since you get more material out of them also. Once you get all of your t-shirts, I would recommend stacking them or laying them side by side in the order that they will be used. Line them up from light to dark, to light to dark, etc. Since some of the shirts will be similar shades you can fade in and out a couple of times and probably get to use all of them. As far as where to purchase your shirts, I got all of mine at Goodwill. It's true that this can get expensive quickly, but if you're making a humungous rug is it going to cost more than you would pay to buy one? Probably not.
Start out by cutting your shirts into long strips, about 1 inch wide. I typically just cut down the shirt length-wise, from the neck to the bottom edge. Next, you will attach these strips to each other to make t-shirt yarn. Here's how:
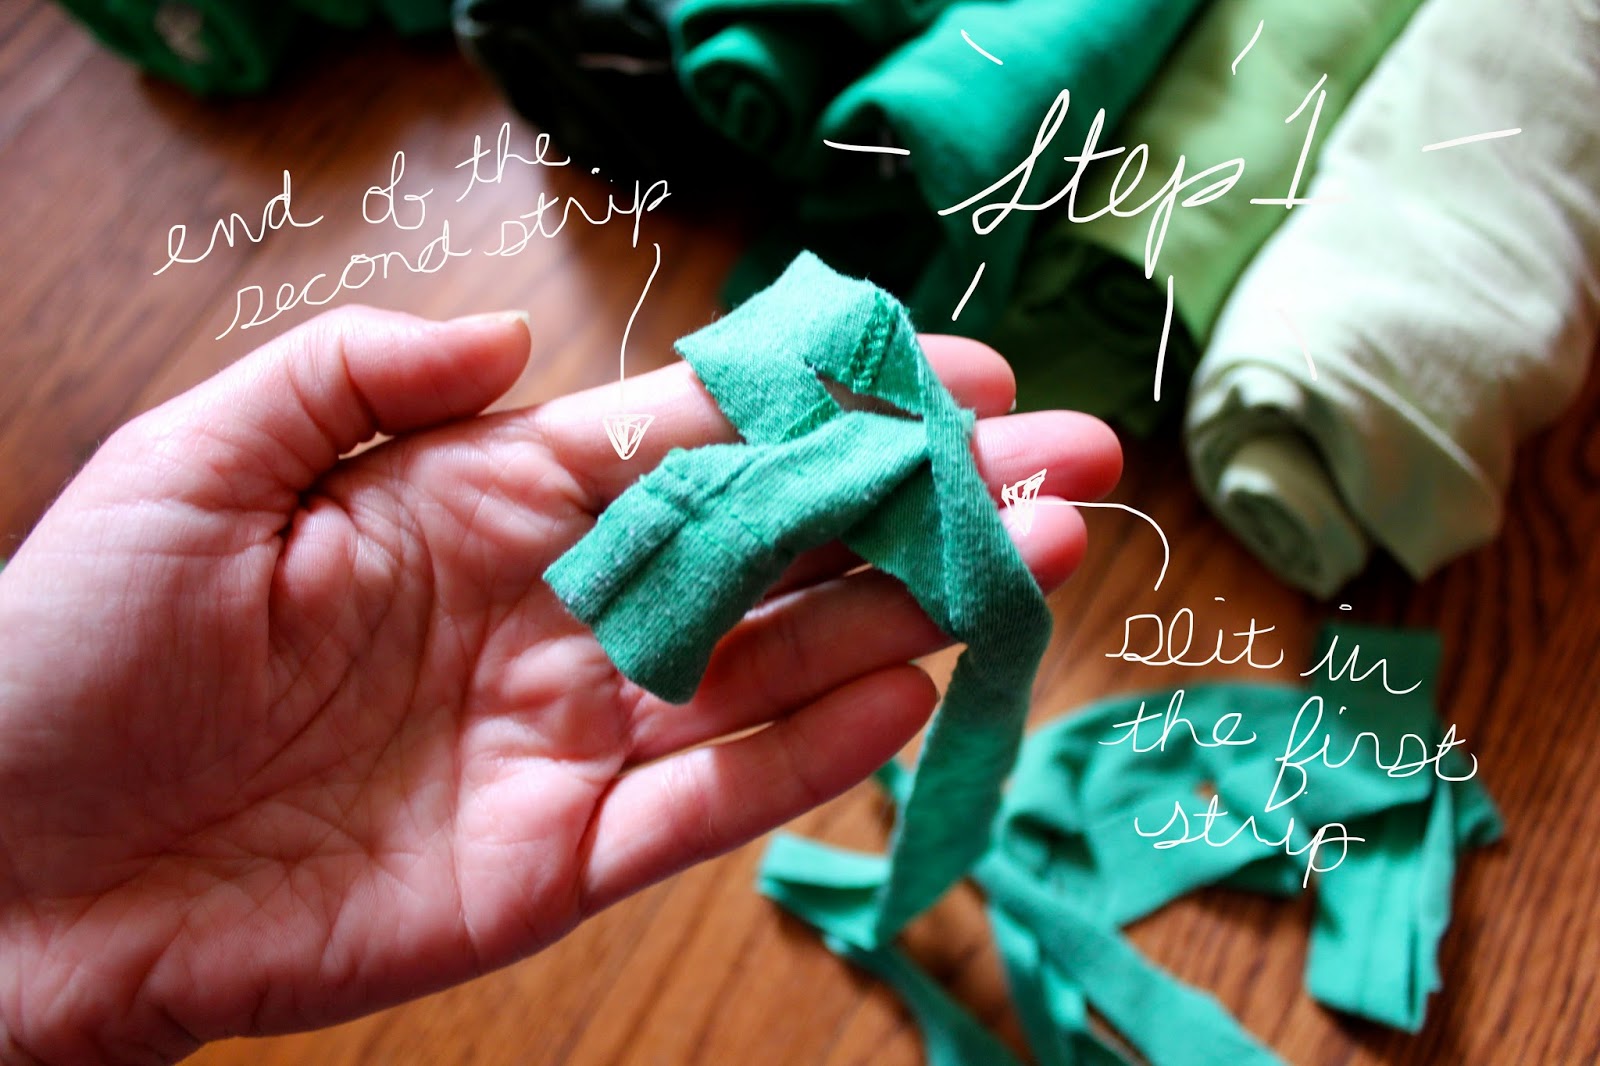
1. Cut a slit in the end of your first strip. Take a second strip, and slip the end of it through that slit. Now you have to secure the second strip so that it does not come out of the first one.
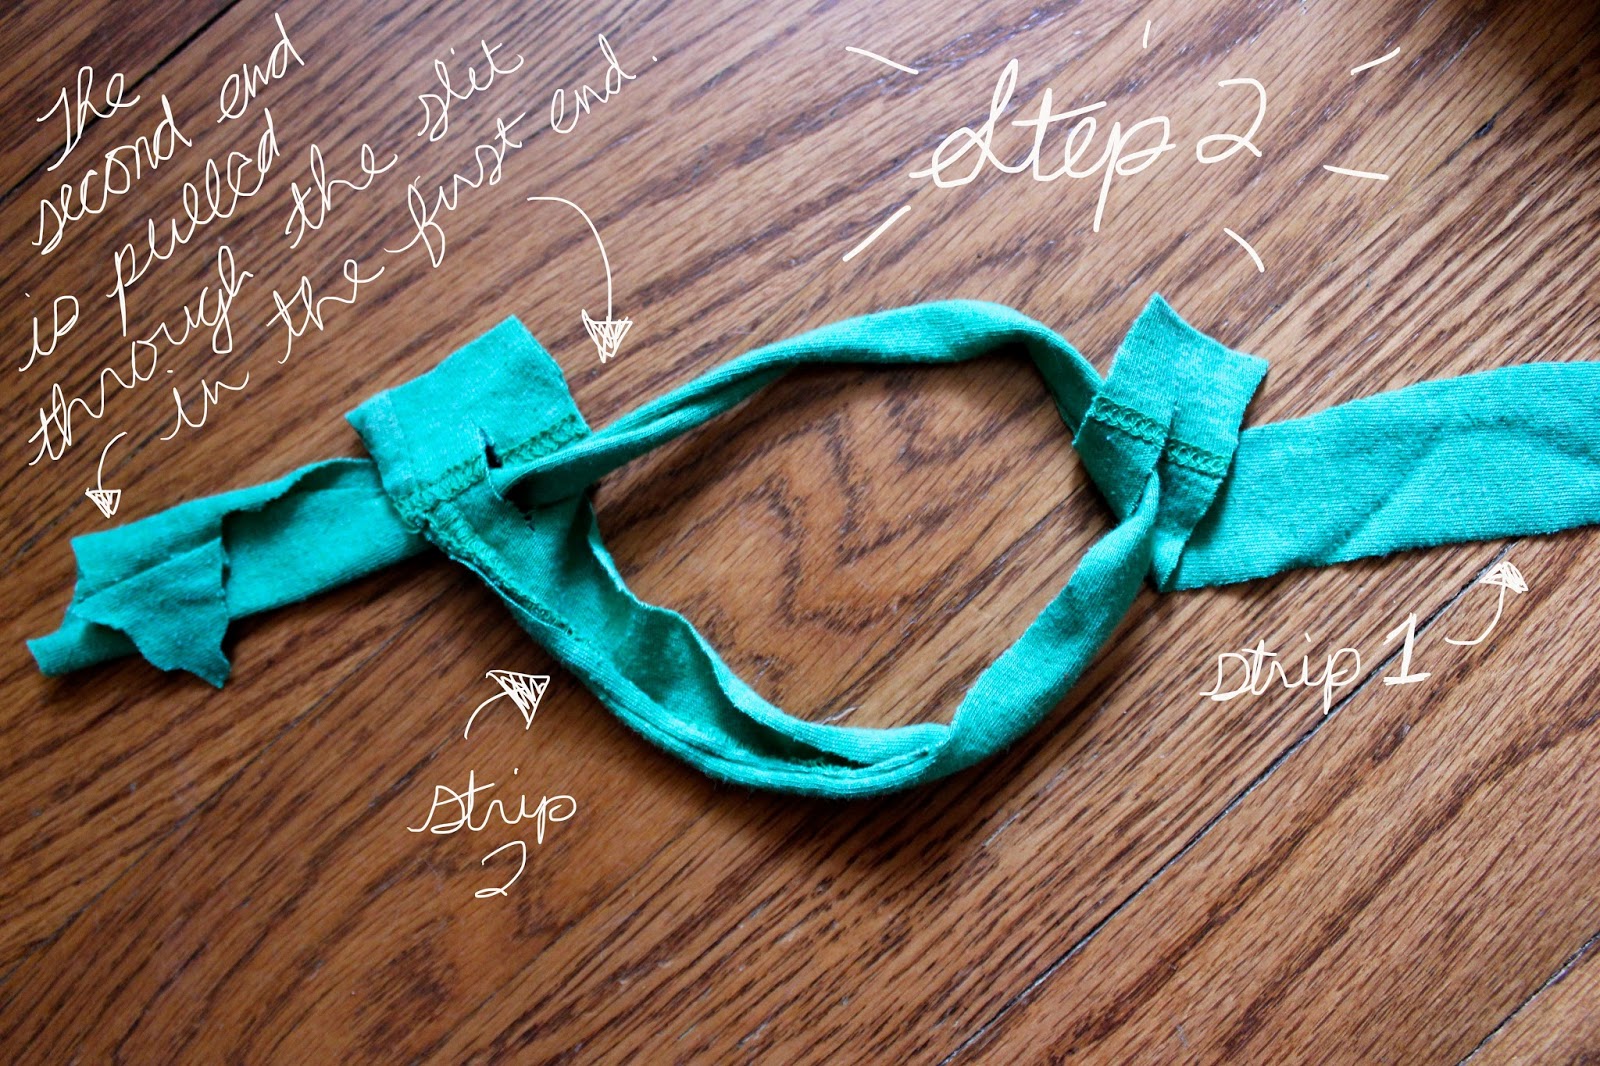
2. Cut a slit in one end of the second strip (while it is still through the first strip). Take the opposite end of this second strip and place it through the slit on its first end. Pull to tighten at the joining end.
Repeat steps 1 and 2 until you have enough yarn to make a rug the size of your choice. I usually just add strips as I go, making yarn for one shirt for instance and balling it up, then making more when I get to the end of the ball. Now you're ready to start crocheting your rug!
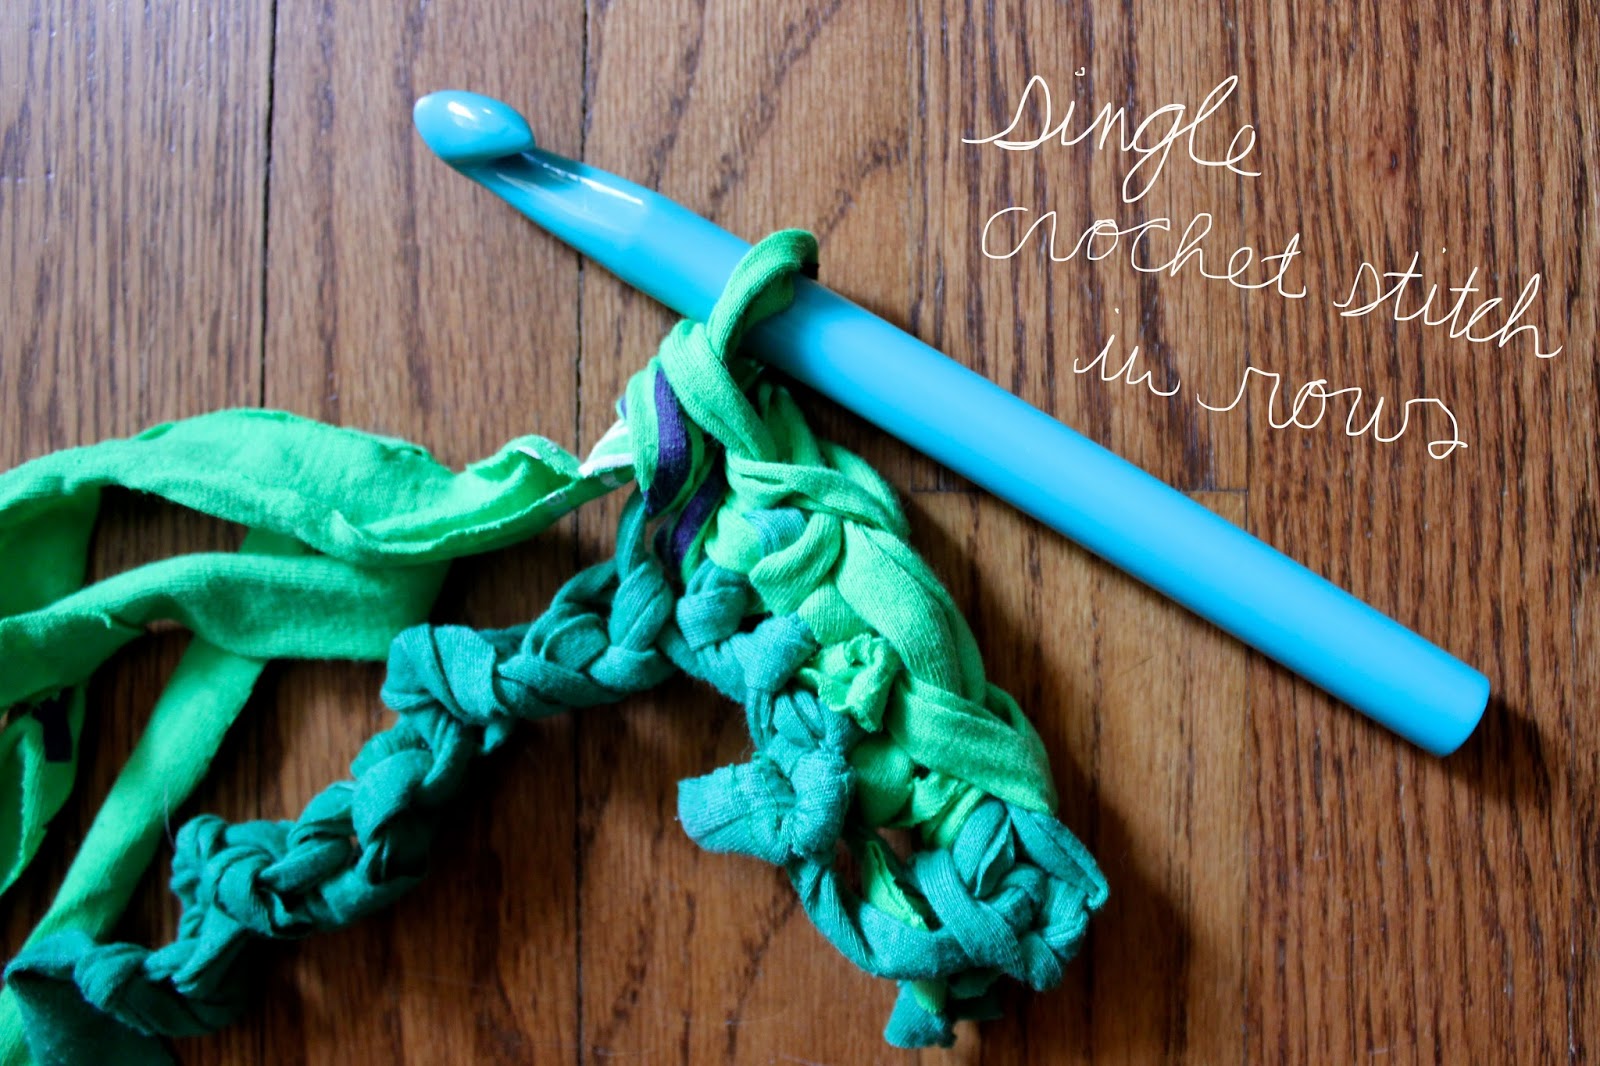
This chain is your first row. Turn and continue down the chain making a single crochet stitch into each stitch of the chain.
Here is a great video tutorial on how to make a row using single crochet. Once you get to the end of the row, you will need to chain one more stitch as you turn, then begin to single crochet into your previous row of crocheted stitches.
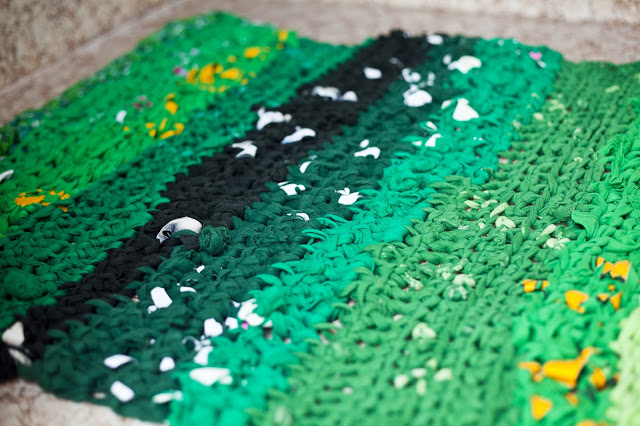
When you get to the end of your second row, turn and stitch back down the row again as established. You will keep doing this until the rug reaches your desired length. It's fun to watch the fade in color unfold! Here's what it will look like when you're done...
This last photo is by courtesy of
Sharalee, one of the owners of the rug. They had a rectangular space, which is why I made it in rows. However, I've made one in the past that was circular and it looks amazing in that shape! Unfortunately I have no good photos of that one and it is no longer in my possession because my cat.. ahem.. became a little too fond of it... But to make a circular rug, all you really need to do is chain about 6 stitches, and then begin your single crochet stitch from there in the very first stitch of the chain to join it in a loop. You will crochet once into each stitch for the most part, but will need to crochet twice into every 3rd - 5th stitch or so to make it lay flat. As you go along it's easy to gauge if you need to do that more often or less often, as the rug will curl if the outer round has too few stitches or it will bunch up if you have too many stitches.
This is a pretty easy and affordable project that will add some color into your home!